The strongest cleaning validation strategy is a risk-based, three-phase lifecycle: design, qualification, and ongoing monitoring, anchored by Quality Risk Management and toxicological limits like HBEL and PDE. Validated sampling methods, documented recovery studies, and an approved protocol tie it together. Start now by running a scoped QRM risk assessment and updating your Cleaning Validation Master Plan to reflect it.
TL;DR:
>
- Risk assessment should justify grouping equipment and selecting worst-case residues to ensure enough sampling and coverage without unnecessary testing.
- Validation methods must include thorough recovery studies with materials identical to actual equipment to produce reliable swab and rinse results.
- Acceptance limits for residue carryover should be based on toxicological data like PDE or HBEL, with detailed documentation of calculation inputs and safety factors.
- Ongoing monitoring, trending, and periodic requalification are essential to maintain control, with specific triggers for investigation or revalidation based on process variances.
- Automated documentation systems help enforce data integrity, reduce cycle times, and ensure audit readiness for every phase of cleaning validation.
Table of Contents
- What Is the Cleaning Validation Lifecycle?
- What Do Regulators Expect From Cleaning Validation Documentation?
- How Do You Apply Risk Management to Grouping and Worst-Case Selection?
- Which Sampling and Analytical Methods Actually Hold Up?
- How Do You Calculate MACO, HBEL, and PDE for Acceptance Limits?
- What Belongs in the Cleaning Validation Protocol and Master Plan?
- How Should Ongoing Monitoring and Requalification Work?
- What Are the Most Common Cleaning Validation Pitfalls?
- Where Does Automation Fit Into a Modern Cleaning Validation Program?
- What Should QA Leaders Do in the Next 90 Days?
- See How Qualitum Closes Cleaning Validation Gaps Faster
- Sources
- FAQ
What Is the Cleaning Validation Lifecycle?
Health Canada's GUI-0028 guide frames cleaning validation as three connected phases, not a one-time exercise you file away after the third successful run. Design work happens once; monitoring never stops. That distinction shapes how you should staff and schedule the program.
Phase 1: design and development. This is where the scientific rationale gets built, and it is the phase most teams rush. You need to define cleaning objectives for each equipment train, identify residues (active ingredients, excipients, cleaning agents, and degradants), and pinpoint hardest-to-clean locations, think dead legs, gaskets, and spray-ball shadow zones. Small-scale challenge trials at this stage catch cleaning procedure weaknesses before they become qualification failures.
Phase 1 deliverables typically include:
- A defined cleaning procedure with critical parameters (time, temperature, concentration, mechanical action) specified as ranges, not vague instructions
- A documented list of target residues and their toxicological data
- Identification of worst-case locations based on geometry and residue history
- Results from bench-scale or small-scale trials confirming the procedure has a reasonable chance of success
Phase 2: qualification. Here you execute a formal protocol under production-representative conditions. APIC's 2021 guidance supports the long-standing industry convention of three consecutive successful runs for a given worst-case scenario before declaring the cleaning method validated. Validated sampling and analytical methods are non-negotiable inputs here, not optional refinements.
Phase 3: ongoing monitoring. Once qualified, the process moves into routine verification, trending, and periodic requalification. Lifecycle learnings from Phase 3, an unexpected excursion, a new formulation, a supplier change, feed back into the Master Plan and can trigger updates to Phase 1 assumptions. This is the phase most audit findings target, because it is the easiest to let slide once the qualification runs pass.
What Do Regulators Expect From Cleaning Validation Documentation?
The FDA's 1993 inspection guide remains the backbone of cleaning validation expectations more than three decades later, and its core demands haven't softened: written procedures, clearly assigned responsibilities, protocol approval before execution, and a final report that ties results back to acceptance criteria.
Inspectors look for a specific evidence chain, and they know where the gaps usually hide:
- Validated sampling methods (swab or rinse) with documented recovery percentages
- Validated analytical methods with specificity, sensitivity, and calibration records
- Toxicological justification for acceptance limits, tied to HBEL or PDE values rather than an arbitrary round number
- ALCOA+ data integrity across every record: attributable, legible, contemporaneous, original, accurate, plus complete, consistent, enduring, and available
Pro Tip: Keep raw analytical data (chromatograms, calibration curves) attached to the batch record, not filed separately. Investigators frequently ask to see the underlying data behind a pass/fail result, and a disconnected filing system is one of the fastest ways to turn a routine question into a formal observation.
Record retention rules vary by jurisdiction and product type, but a common baseline is retaining cleaning validation records for the life of the product plus several years, matching your batch record retention policy. Electronic records need the same audit trail rigor as paper: timestamped, attributable, and protected against undisclosed edits. A recurring inspection observation is validation reports that reference "acceptable" recovery without showing the calculation or raw recovery data, an easy fix if you build the habit now.
How Do You Apply Risk Management to Grouping and Worst-Case Selection?
Quality Risk Management isn't a compliance checkbox tacked onto the process. It's the mechanism that lets you justify testing fewer combinations without cutting corners, and it's what an inspector will ask you to defend if you've reduced scope through grouping or bracketing.
- Assess equipment similarity. Group equipment by shared design, materials of construction, and cleaning procedure. Two tank reactors with identical geometry and the same wash cycle can often share a validation study; a reactor with a different agitator design typically cannot.
- Build a worst-case matrix. Score each product or residue against potency (PDE or ADE), solubility in the cleaning agent, formulation complexity, historical cleanability data, and operator variability in manual cleaning steps. The product that scores worst across these axes becomes your representative case.
- Account for missing toxicology. When PDE or ADE data don't exist for a given compound, the APIC guide recommends applying the most conservative surrogate available and documenting exactly why you chose it.
- Document the rationale, not just the conclusion. An inspector doesn't just want to see which product you selected as worst-case; they want to see the scoring logic and the data behind it.
- Confirm sample size and coverage. Worst-case selection determines how many runs and how many sampling locations are enough. Under-sampling a reduced scope is where risk-based programs lose credibility fast.
As MHRA's guidance on cross-contamination control makes clear, QRM isn't a background assumption; inspectors expect you to produce the risk assessment itself, not just its conclusions. Keep it as a standalone document with version control, referenced from both the Master Plan and individual protocols. A risk-based validation framework built this way scales far better than ad hoc justifications written protocol by protocol.
Which Sampling and Analytical Methods Actually Hold Up?
Swab sampling and rinse sampling answer different questions, and picking the wrong one for a given surface is a common source of indefensible data. Swabbing directly targets a specific surface area and works well for accessible, flat, or moderately contoured equipment surfaces. Rinse sampling covers larger or inaccessible areas, piping runs, closed vessels, but dilutes the residue, which can push results below your method's sensitivity if you're not careful.
For hard-to-clean locations, gaskets, valve bodies, spray-ball shadows, a combined approach usually wins: rinse sampling for overall coverage, swab sampling targeted at the specific worst-case spots identified during Phase 1 design work.
Recovery studies are where most programs quietly fail. A failed or missing recovery study invalidates any negative result generated using that sampling method, because you can't prove the swab or rinse actually captured the residue that was there. To document a recovery study correctly:
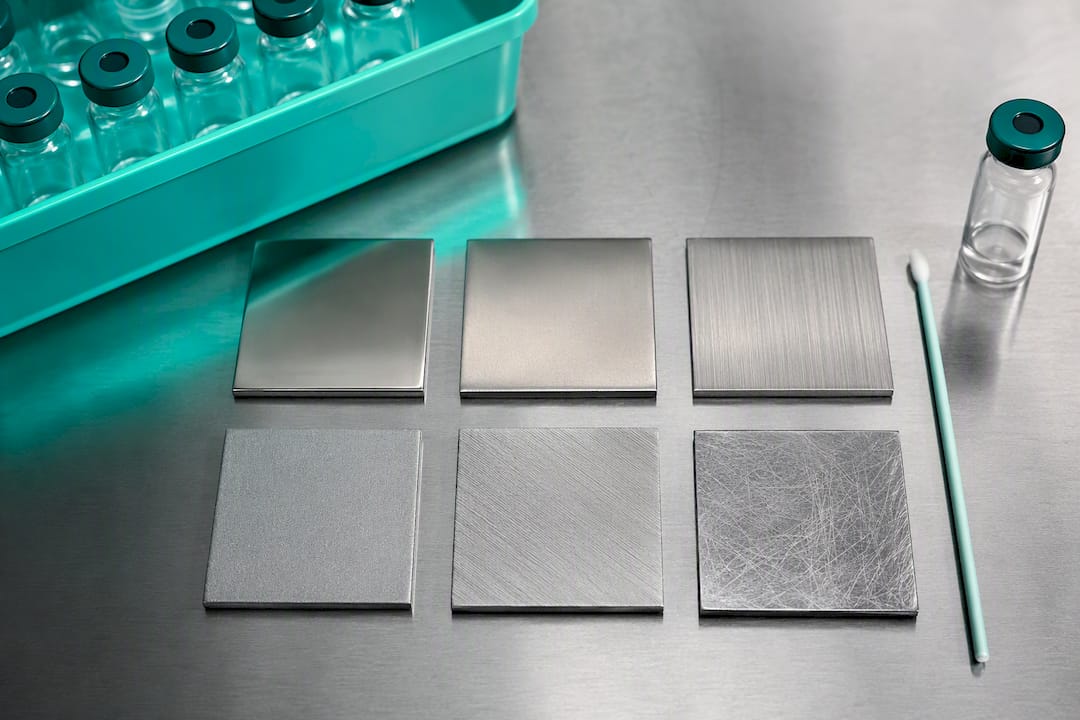
- Spike a coupon of the same material and surface finish as the actual equipment with a known residue concentration
- Sample it using your exact swab or rinse technique and calculate the recovery percentage
- Report the recovery percentage explicitly in the validation report and apply it as a correction factor to field results
- Test at multiple spike levels near your acceptance limit, not just one convenient concentration
- Account for blanks and known interferences from the swab material or cleaning agent residue itself
Analytical method validation follows familiar ICH-aligned principles: specificity (does the method distinguish your target residue from background), sensitivity (LOD/LOQ well below your acceptance limit, not just in the same order of magnitude), and documented calibration. A method with an LOQ close to your acceptance limit gives you almost no room to demonstrate a confident pass, which is a design flaw worth catching before qualification, not during it.
How Do You Calculate MACO, HBEL, and PDE for Acceptance Limits?
Maximum Allowable Carryover, or MACO, is the mathematical bridge between toxicology and a number you can actually measure on a swab or in a rinse sample. The PDE or ADE value for a compound represents the dose considered safe for a patient, and MACO translates that into how much residue can remain on shared equipment before the next batch.
The general MACO logic multiplies the PDE by the smallest batch size of the next product, then divides by the largest daily dose of the product being cleaned for. That result gives you the total allowable carryover in the whole equipment train, expressed in milligrams.
From there, conversion to a practical acceptance criterion depends on your sampling method:
- Swab limit (mg per swab): divide the total MACO by the total shared surface area, then multiply by the swabbed area, factoring in your recovery percentage from the study described above.
- Rinse limit (mg per rinse volume): divide the total MACO by the rinse solvent volume used to flush the equipment train, again correcting for recovery.
Both calculations assume the equipment surface area and rinse volume are documented and verified, not estimated from a drawing. When toxicological data support a very generous MACO but visible residue would still remain below that number, tighten the limit to a stricter visual or operational criterion and document why, usually because a visibly dirty surface fails on its own regardless of what the math allows. Record the safety factor and every input value in the calculation itself, not just the final number, so a reviewer three years later can reconstruct your logic without guessing.
What Belongs in the Cleaning Validation Protocol and Master Plan?
A protocol and a Master Plan serve different purposes, and conflating them is a common source of confusion during audits. The protocol governs execution of a specific study; the Master Plan governs the program.
A complete cleaning validation protocol should specify:
- Objective and scope, naming the exact equipment, product, and residues covered
- Roles and responsibilities for execution, sampling, analysis, and approval
- The cleaning procedure being validated, referenced by document number and version
- Sampling plan: locations, method (swab or rinse), and the rationale for each
- Analytical methods, with references to their validation reports
- Acceptance criteria, tied explicitly to the MACO calculation and safety factor used
- Number of runs required, typically three consecutive successes for the worst case
- Deviation handling procedure, defined before execution begins, not improvised afterward
The Master Plan sits above individual protocols and should define your grouping and bracketing policy, the requalification schedule, training requirements for sampling personnel, roles and responsibilities at the program level, and how trending data feeds into periodic management review. A Master Plan built around these elements becomes the single reference document an inspector can use to understand your entire cleaning validation program in one sitting, rather than piecing it together from a stack of disconnected protocols.
Clear audit trails matter as much as the content itself. Every deviation, every retest, every change to a sampling location needs a documented reason and an approval signature, timestamped and traceable back to the original protocol.
How Should Ongoing Monitoring and Requalification Work?
Once a cleaning process is qualified, the real test of a lifecycle program is whether it stays in control without another full validation cycle every time something minor changes. Routine rinse-water monitoring, periodic verification runs, and environmental checks form the backbone of Phase 3, with frequency set by risk rather than habit.
A reasonable cadence, drawn from common industry practice, might include:
- Routine rinse monitoring after every batch or campaign for high-risk equipment
- Periodic verification runs on a defined schedule, with industry guidance suggesting at least once every three years for equipment, and annual audits for indicator products where relevant
- Trending reviews on a regular cycle to catch slow drift before it becomes an excursion
Certain events should trigger an investigation or requalification regardless of schedule: a trend excursion outside established limits, a change to the product, process, or equipment, a new cleaning agent, or any deviation tied to cleaning performance. As ISPE notes, strong ongoing trending evidence can actually reduce how often full requalification is needed, provided the data genuinely shows the process remains in control.
Closing the loop means feeding excursions into CAPA, documenting the root cause, and bringing findings to management review on a defined cadence, not just when something breaks.
What Are the Most Common Cleaning Validation Pitfalls?
Recovery studies are the single most cited weakness in cleaning validation packages, and it's rarely because teams skip them entirely. It's because the recovery study uses a different surface finish than actual production equipment, or the spike level doesn't bracket the acceptance limit, making the "acceptable" recovery percentage meaningless in practice.
Sampling bias creeps in when the same technician always swabs the easy, accessible spots instead of the worst-case locations identified in Phase 1. Invalidated analytical methods show up when a lab uses a method validated for a different matrix or concentration range without re-verifying it fits the new application.
Pro Tip: When a result exceeds your acceptance limit, resist the urge to simply re-clean and re-sample. Document the investigation first: was it a true cleaning failure, a sampling error, or a recovery issue? Skipping straight to remediation without root cause analysis is exactly the pattern inspectors flag as inadequate investigation.
Structure any exceedance investigation around the same three questions every time: was the cleaning procedure followed, was the sampling valid, was the analytical result reliable. Answering out of order usually leads to the wrong corrective action.
Where Does Automation Fit Into a Modern Cleaning Validation Program?
Every phase above generates paperwork: protocols, recovery study reports, sampling chain-of-custody records, trending dashboards. Authoring and cross-checking that documentation manually is where most validation timelines actually slow down, not the science itself.
Practitioners increasingly expect validated digital systems to capture chain-of-custody, recovery study data, and automated trending in a way that shortens both the audit and the investigation that follows it. That shift is less about replacing scientific judgment and more about eliminating the hours lost to reformatting the same data into three different documents.
Qualitum's agentic Validate·AI platform applies this directly to cleaning validation: protocol authoring, recovery-study traceability, and sampling documentation are agent-generated and checked against ALCOA+ criteria at both write-time and review-time, rather than caught in a final QA pass.
If you're evaluating any automation platform for this work, three things matter more than feature lists: how it enforces data integrity at the point of entry, how tightly it integrates with your existing quality management system, and whether the deployment model itself has been validated.
What Should QA Leaders Do in the Next 90 Days?
Cleaning validation programs rarely fail because the science is wrong. They fail because the risk assessment was never written down, or the recovery study got treated as a formality instead of the foundation it actually is.
If you're rebuilding or tightening a program this quarter, sequence it like this. First, run a targeted QRM workshop, not a generic risk brainstorm, focused specifically on identifying your true worst cases and the sampling scope they justify. Second, pick one analytical method and validate it properly with a documented recovery study before you lean on it for anything else; everything downstream depends on that number being real. Third, update your Cleaning Validation Master Plan to reflect what the workshop actually found, and pilot automated evidence capture on a single equipment train before rolling it out everywhere. The teams that get this right treat the Master Plan as a living document, not an artifact you write once and defend forever.
— Matt
See How Qualitum Closes Cleaning Validation Gaps Faster
Qualitum replaces the manual authoring bottleneck that slows down cleaning validation cycles, protocols, recovery-study documentation, and trending reports get generated by agents and checked against ALCOA+ at write-time and review-time, not caught later in a review queue.
That matters most in the phases covered above: Phase 2 qualification protocols that used to take weeks of drafting, recovery study reports that need airtight traceability, and Master Plans that stay current instead of going stale between audits. The platform integrates with your existing quality management system rather than replacing it, and every record carries a defensible audit trail from the moment it's written.
If your program has gaps you suspect but haven't quantified, start with the Free Validation Gap Report to see where your cleaning validation documentation stands against current expectations, or book a working session to walk through your specific equipment trains and worst-case logic with the team.
Sources
For deeper technical grounding, the FDA inspection guide covers documentation and toxicological justification; Health Canada's GUI-0028 defines the lifecycle framing; and APIC's guide supplies worst-case and grouping methodology. Teams handling complex APIs, including peptide-based products, can find sourcing and quality context in this peptide quality assurance guide.
- Validation of Cleaning Processes (FDA inspection guide 7/93)
- Cleaning validation guide (GUI-0028) - Health Canada
- APIC cleaning validation guide (2021)
FAQ
How do you perform a cleaning validation?
Run it as a three-phase lifecycle: design the cleaning procedure and identify worst cases, qualify it with three consecutive successful runs using validated sampling and analytical methods, then monitor it continuously with trending and periodic requalification.
What is the 10 ppm criteria for cleaning validation?
The 10 ppm rule is a legacy rule-of-thumb acceptance limit, not a regulatory requirement; modern programs calculate limits from MACO using toxicological PDE or HBEL data instead, since a flat ppm figure ignores actual potency and dose.
What are the FDA guidelines for cleaning validation?
The FDA's inspection guide requires documented responsibilities, validated sampling and analytical methods, recovery studies, and toxicologically justified acceptance limits, all captured with ALCOA+ data integrity.
What do ICH guidelines say about cleaning method validation?
ICH principles for method validation apply directly to cleaning: analytical methods must demonstrate specificity, sensitivity, and calibration accuracy, with LOD/LOQ well below the acceptance limit so results near the limit remain trustworthy.
How can automation support a cleaning validation strategy?
Platforms like Qualitum's Validate·AI automate protocol authoring and check every record against ALCOA+ at write-time and review-time, cutting authoring time significantly while strengthening the audit trail behind recovery studies and sampling records.
Recommended
- Qualification vs Validation: A Practical Guide for Pharma QA
- Sterilization Validation: A Lifecycle Guide for QA Teams
- Risk-Based Validation: A Practical Guide for QA Leads
FAQ
How do you perform a cleaning validation?
Run it as a three-phase lifecycle: design the cleaning procedure and identify worst cases, qualify it with three consecutive successful runs using validated sampling and analytical methods, then monitor it continuously with trending and periodic requalification.
What is the 10 ppm criteria for cleaning validation?
The 10 ppm rule is a legacy rule-of-thumb acceptance limit, not a regulatory requirement; modern programs calculate limits from MACO using toxicological PDE or HBEL data instead, since a flat ppm figure ignores actual potency and dose.
What are the FDA guidelines for cleaning validation?
The FDA's inspection guide requires documented responsibilities, validated sampling and analytical methods, recovery studies, and toxicologically justified acceptance limits, all captured with ALCOA+ data integrity.
What do ICH guidelines say about cleaning method validation?
ICH principles for method validation apply directly to cleaning: analytical methods must demonstrate specificity, sensitivity, and calibration accuracy, with LOD/LOQ well below the acceptance limit so results near the limit remain trustworthy.
How can automation support a cleaning validation strategy?
Platforms like Qualitum's Validate·AI automate protocol authoring and check every record against ALCOA+ at write-time and review-time, cutting authoring time significantly while strengthening the audit trail behind recovery studies and sampling records.